Preparing the roof
The type of roof is not relevant. A TONZON insulated dry liner is always a solution, regardless of the surface to which it is applied - whether brick, wood or thatch. The finished surface of the wall to be insulated is also irrelevant. However, it is recommended that the wall is as even as possible. Very rough walls, e.g. when some parts are plastered and others aren't, can make it difficult to mount battens in a level plane. If they are not level this may cause problems later, when finishing.
It is also important to know whether the roof is vapour permeable or vapour proof. If the roof is vapour permeable, it is recommended to cover the entire wall with Thermosheets first, to make it completely vapour and wind-tight. For extra security the Thermosheets can be stapled, in addition to gluing. If stapling, use foil reinforcers.
What do you need?
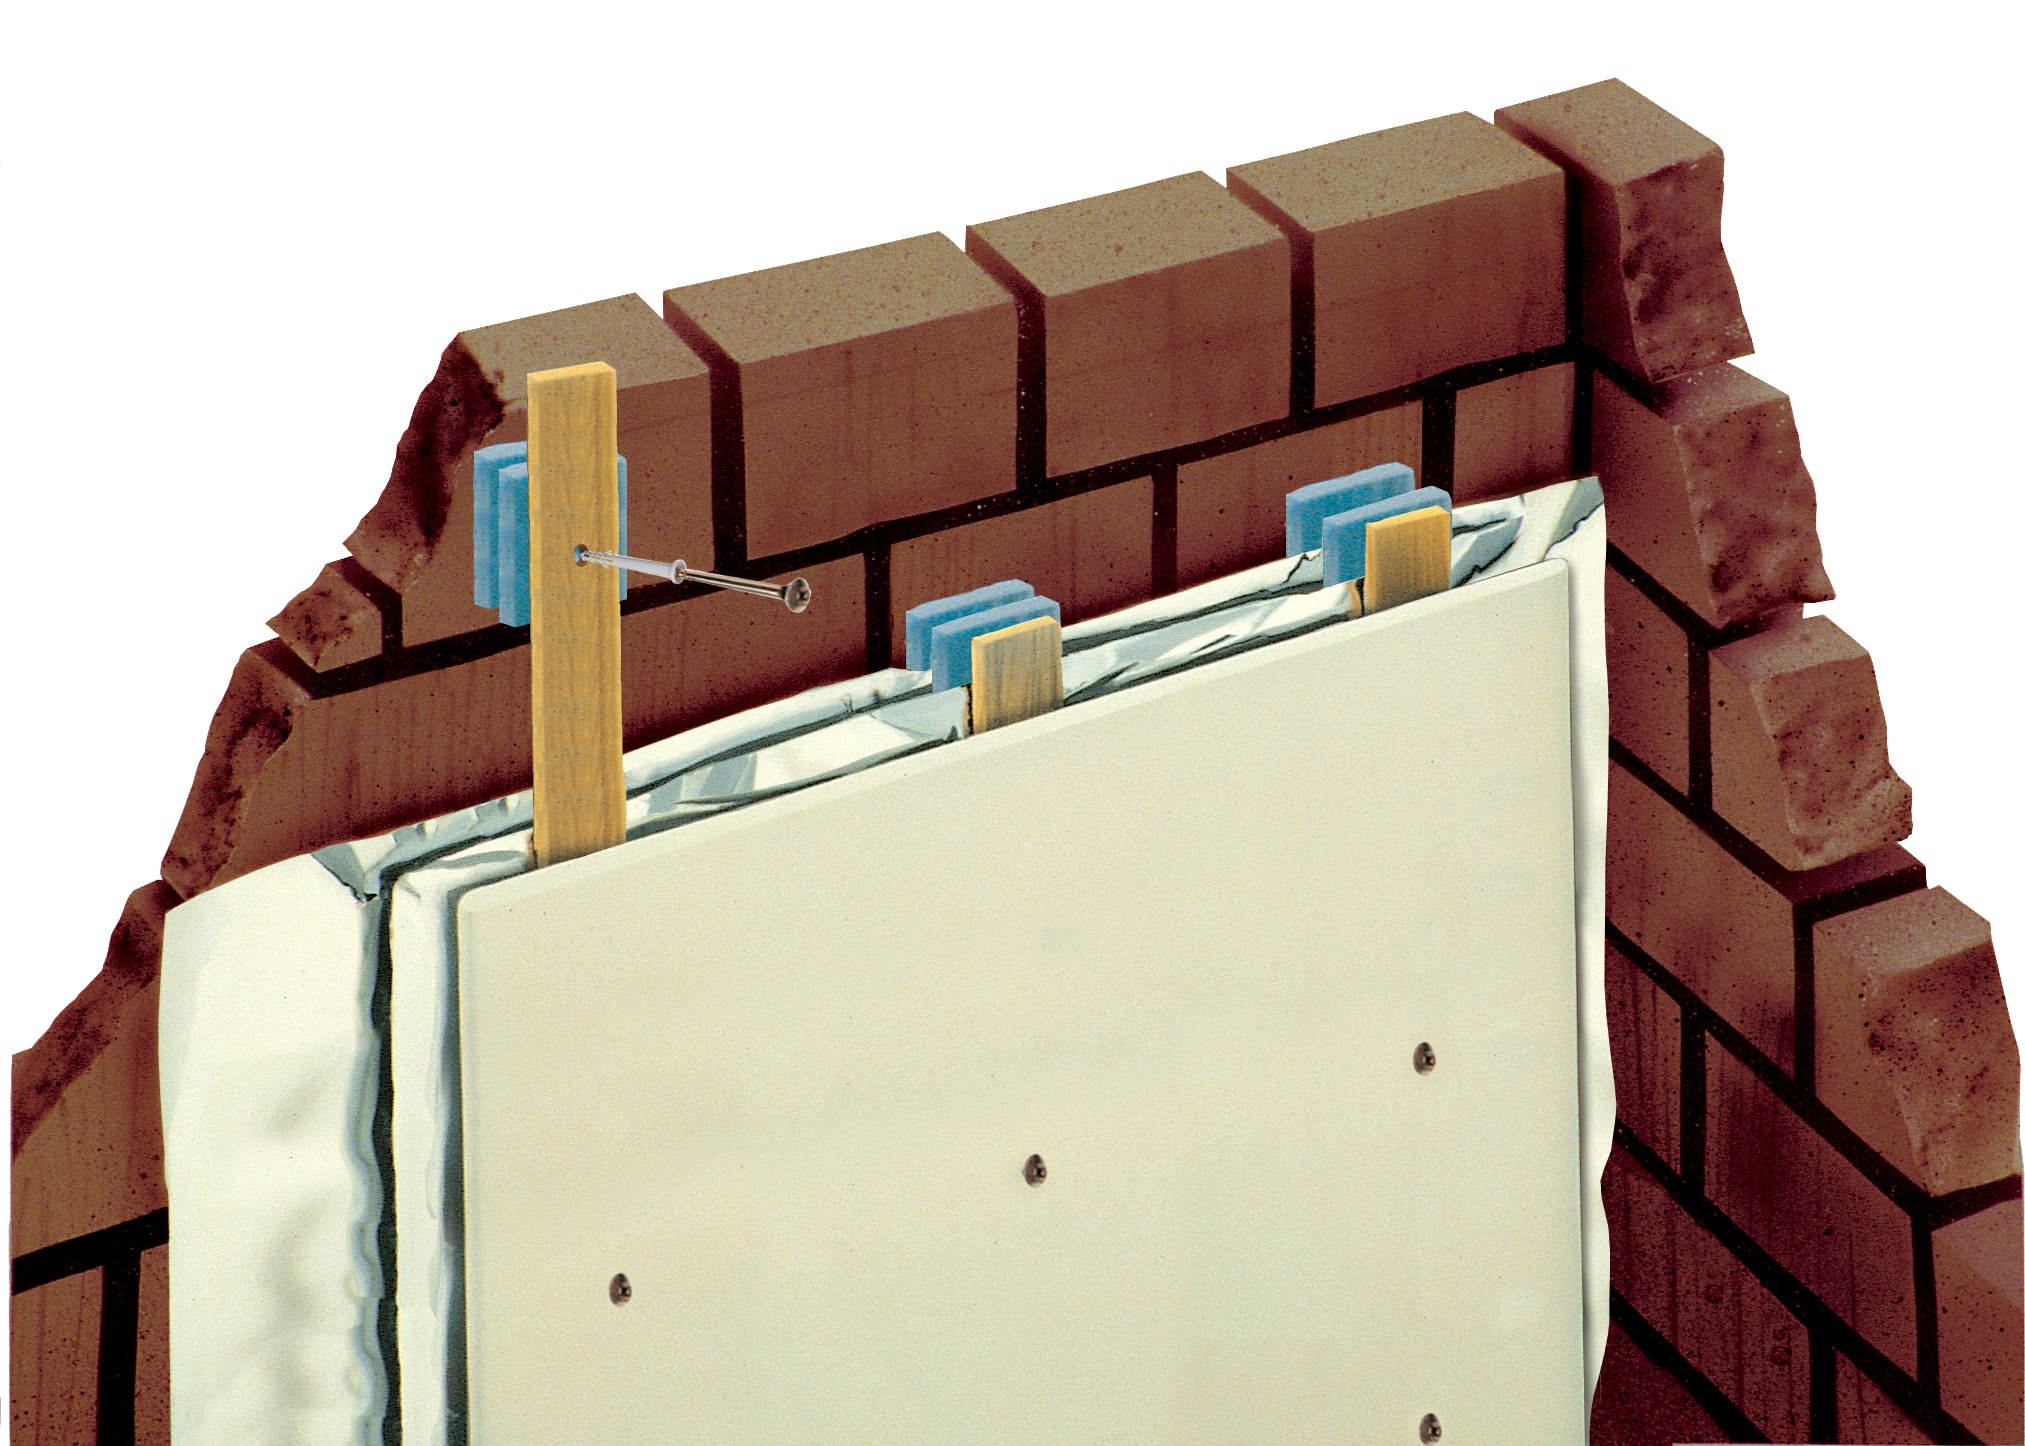
The insulation is applied in layers, with alternating foil and air layers. TONZON Thermosheets are stretched over the entire wall. They are kept apart by a framework of battens. Battens and cold bridge breakers must be alternated, per layer.
- Thermosheets (cut to size)
- Cold bridge breakers (available in the form of XPS strips)
- Foil glue
- Battens (1.5 / 1.8 / 2.0 cm thick)
- hammer-in plugs (6-8 cm long)
- Electric drill

Taking measurements
The Thermosheets are available in wall height and in widths of up to 450 cm. The length required depends on the width of the wall. Allow at least 20 cm extra length so that each sheet has enough slack. Take the finish into account when determining the number of battens and cold bridge breakers. For example, if the dry liner is plasterboard of 60 cm width, the battens should be 60 cm apart, centre-to-centre. The battens are mounted with two layers of cold bridge breakers per layer of battens. The cold bridge breakers are mounted as blocks, with one every 50 cm. See illustration. Foil adhesive is used to glue the edges of the wall and the XPS blocks. This requires about 40 ml of glue per square metre of surface to be glued. Use 80 ml of glue for a wooden surface. Use at least one 125ml jar per 10m² wall for a structure with 5 air layers.
Mounting the insulation
The insulation is applied in layers. The glue needs some time to dry. So start by spreading glue on the edges and the cold bridge breakers.
Read instructions for insulating a roof here. Or watch the video, alongside.
This video explains how to work around a window or door opening.
Roof with wooden beams
Thermos cushions are ideal for hanging between beams. Whether you have a pitched roof or a flat roof really doesn't matter. The method used to mount them is similar to that used with wooden floors. The cushions are fixed directly to the wooden beams, using staples. For instructions, view this guide.
Suspended or system ceilings
If you have a floating or suspended ceiling, Thermos Cushions are a good way to add extra insulation value. These ceilings are often difficult to insulate because of the brackets used to suspend them. Thermos cushions are available in different widths, allowing you to fit the cushions in strips that fit exactly between the brackets. The cushions can be attached using staples, glue or plugs, depending on the roof material. The cushions can be fitted in the same way as under a floor. For instructions, view this guide.
.


